interesanti:
[You must be registered and logged in to see this link.]DC Halloween at Monster High It all started with a random impulse idea to make Draculaura a Harley Quinn outfit for halloween. I've got tons of remnants and while cleaning out my fabric bin I decided I can put them to use making doll clothes. Only problem is, I'm not really crazy about making doll clothes. I'm not very good at it and I get easily frustrated working on such a tiny scale. At the same time I want to try to get better at it and that only happens by practicing.
I've had quite a few people ask about how I made the DC outifts and what patterns I used ect. And although I'm definitely not a pro at this, I want to share my experience and how I went about it and maybe it can help someone else.
(**IF you use this as a guide for your own super hero's, I"d appreciate a link back and I"d love to see your projects!
Thank you!
<3)
First off, I'm a huge vintage pattern and just a pattern collector, I've got file cabinets full of patterns for adults and kids. Maybe a couple of doll patterns.
So I find it useful to reference those patterns whenever I try to draw something on a smaller scale for a doll. This is not particularly easy and there really is no short cut. I draw out the pattern on a piece of paper over a trace sketch of my dolls body.
[You must be registered and logged in to see this link.] That way I can gauge about how big I need to draw the pattern. More likely than not, your first draw isn't going to be the purfect pattern, it's helpful to have cheap scrap fabric to test your pattern on. Or just have extra fabric.
THis is my original draw for the body suit pattern. It includes a sleeve, a collar and a front and back pattern piece for the body suit. It might look like the center hole there is for the neck but it's actually for the sleeve. So that one piece is a front AND back.
[You must be registered and logged in to see this link.] Now this pattern I drew did need adjustments, it was too big in the crotch and upper leg areas. YOu really just have to play with the pattern you draw until you get it they way you want it. Keep in mind that different kinds of fabrics work differently with certain patterns. So say I wanted to make a Jeans jumpsuit, after adjusting this pattern for the right fit with stretch fabrics, it might not work the same for a fabric that's not so stretchy like jeans.
So after you have a pattern, you can cut it out.
[You must be registered and logged in to see this link.] Now I"m a self taught sewer and I had not idea that for stretchy fabrics it's best to use a stretch stitch until someone told me, so if your new to sewing or new to sewing stretchy stuff make sure you use a stretch stitch which in my case is #02.
[You must be registered and logged in to see this link.] First thing you want to sew is the front seam.
[You must be registered and logged in to see this link.] Then open it up.
This is what it looks like unfolded:
[You must be registered and logged in to see this link.] Then you want to add your sleeves. This is a tricky part. But it's much easier to add the sleeves before you close it up. IF you close it up first, or find that it's too hard to sew in the sleeves with the machine, as you have to work in a circular motion, that's ok, you can simply hand stitch the sleeves in place. I'd rather battle with the circular machine stiching as I find it easier since my hand stitching gets really messy when I'm impatient.
[You must be registered and logged in to see this link.] Since I'm working on red claw body suit, (which only has one sleeve) I'm ready to move on to the next step which is closing your body suit at the shoulder seams. Remeber to hem you your sleeves before stiching them closed.
[You must be registered and logged in to see this link.] After you do this step then you add in the collar, which I didn't take pictures of since Red Claw's suit doesn't have a collar.
YOu simply take your collar piece and fold it in half, you can stitch it together to help it stay in place. Put right sides together with the suit and stitch.
After you add in the collar you want to sew a bit of the back seam like this:
[You must be registered and logged in to see this link.] Then you fold your suit to match up your center seams. Front center seam touching back center seam and then sew up the legs, but remember to hem them first as it's much easier to do that.
When your done it should look like this.
[You must be registered and logged in to see this link.] Then turn it. YOu will need something to help you turn the fabric right side out.
I use this tool I found at Joanns a while back but you can use a seam ripper or a pin even to help you pull it along.
[You must be registered and logged in to see this link.] The last thing I do is sew in the Velcro after I've tried it on the doll to make sure it fits nicely. After making the last adjustments needed, Tadaa!
Super Villan!
XD
[You must be registered and logged in to see this link.] For Riddler, for his pants I basically just cut two rectangles sewed them together diagnaly at a corner for the crotch then opened them up, hemed them, added a waist and sewed up the legs. I didn't take any pictures of this, so I'm sorry if it doesn't make sense I can try to explain it better latter on. When I make pants for Duece as the Joker.
For the shirt I used Holt's shirt as a pattern.
[You must be registered and logged in to see this link.] This is my initial draw, again it's not purfect.
[You must be registered and logged in to see this link.] For the coat I used a barbie ken coat to reference for my pattern.
[You must be registered and logged in to see this link.] I had to play with the sleeves a few times before I finally got them to fit, they are still not right in this finished coat. Too tight and too short.
YOu just have to keep doing it till you get the pattern right, at least this is how I draw/draft... my patterns.
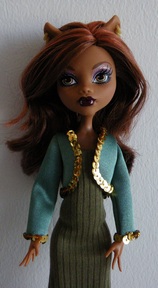
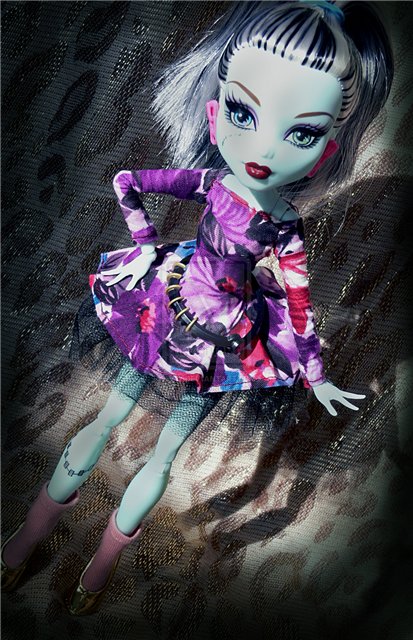
[You must be registered and logged in to see this link.] and here's the whole gang so far:
[You must be registered and logged in to see this link.]


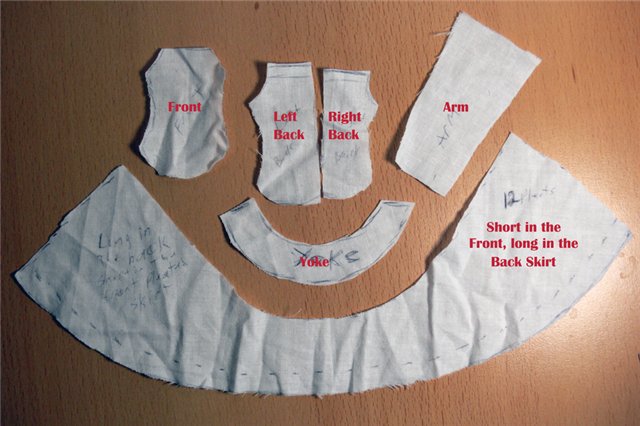
 . I left the arm wide in the pattern, that way many different sleeve styles could be made. I didn't actually use the yoke for the dress I made, but thought it would be nice to have one on hand just in case I wanted to make a skirt (by the way, the skirt is pleated).