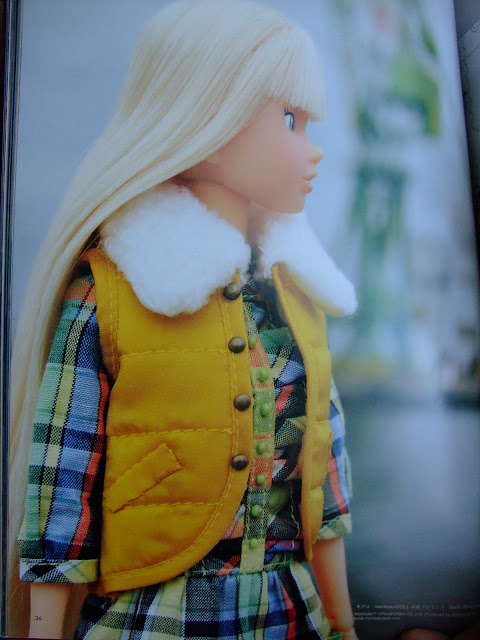
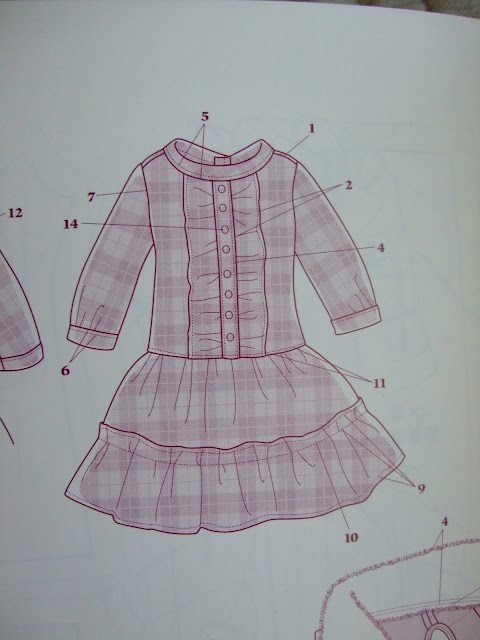
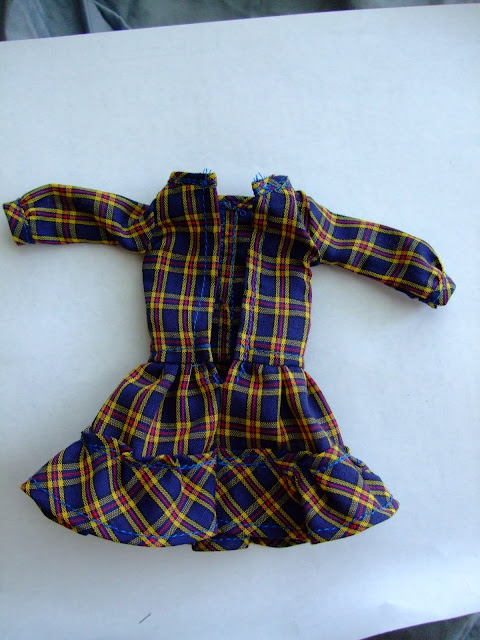
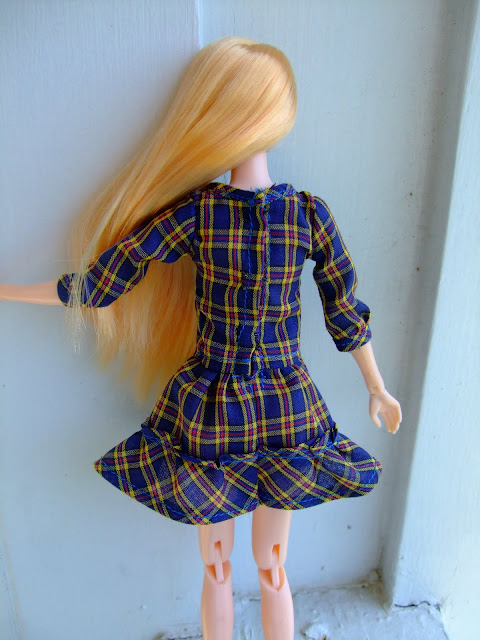
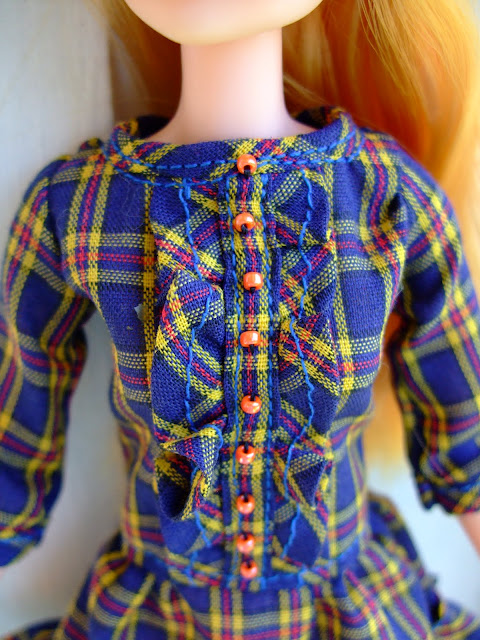
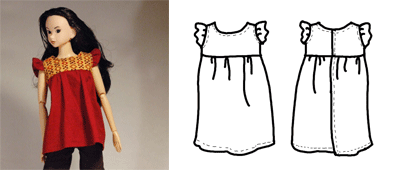
I thought y'all might like to see the steps I followed to make a dress from the DCR No. 11 book. It's the plaid dress featured on page 36, index page 44, and pattern pages 98-99. Here are the pictures from the book:
Spoiler:
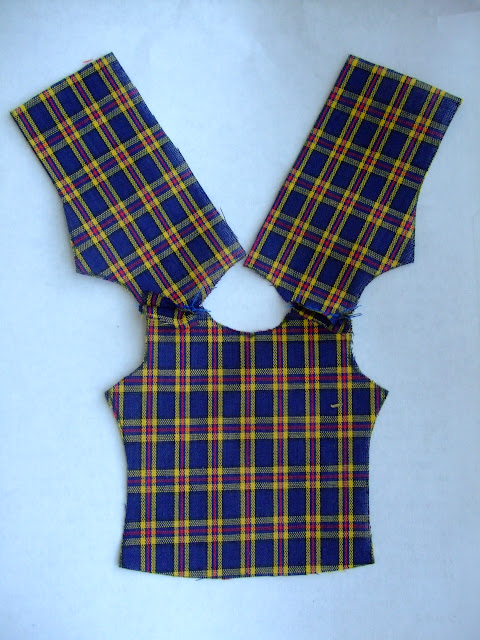
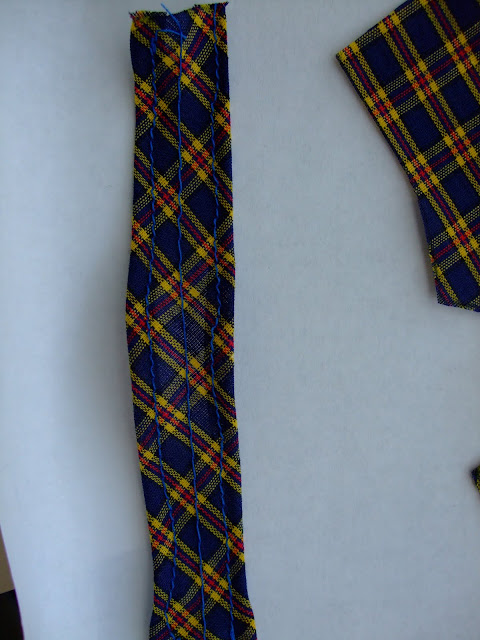
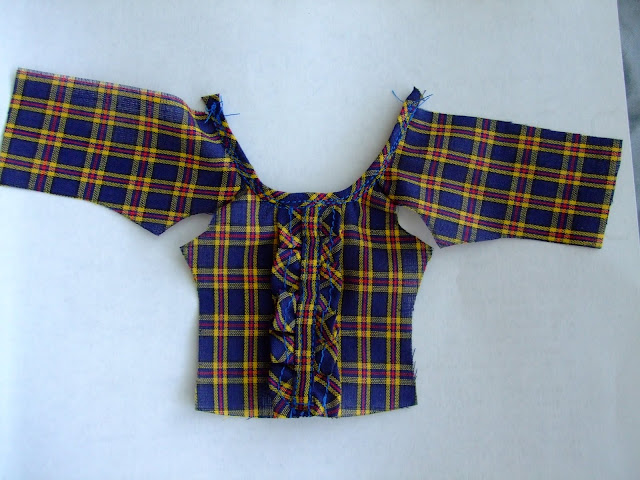
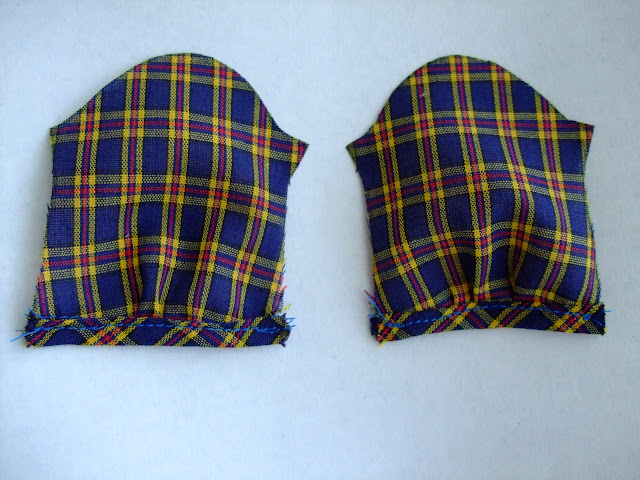
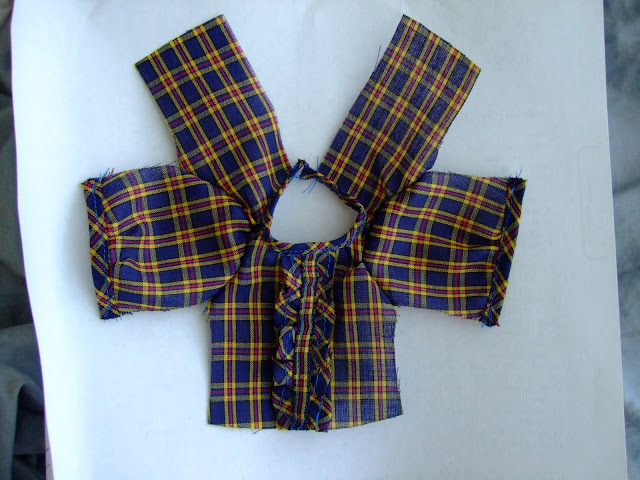
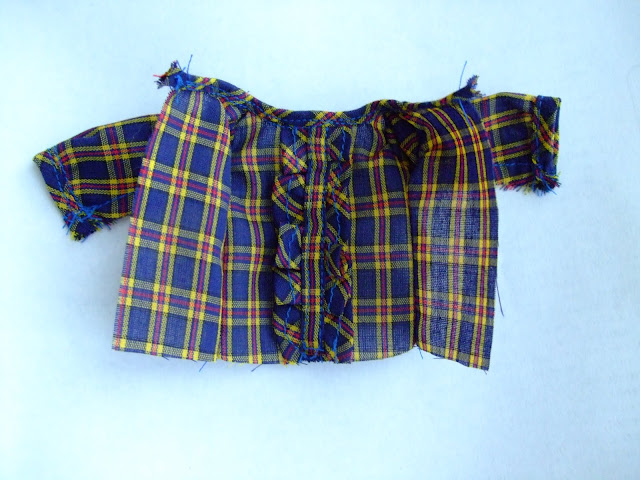
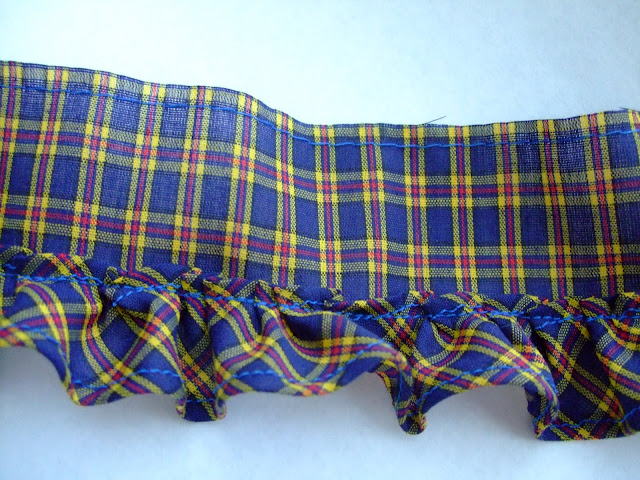
The first steps are copying and cutting out the pattern pieces, tracing and cutting out the fabric pieces, and reviewing the assembly order diagram. I can't read the Japanese, so I needed to ask my Japanese co-worker for some help with one step, number 5. I couldn't find a pattern piece for the neck binding, and that turned out to be because step 5 tells you to cut your own bias tape for the binding. After I had that figured out, the rest was logical enough. Step 1 - sew the bodice shoulder seams. Step 2 - hem and run a gathering stitch on the CF ruffle piece. Step 3, 4, and 5 - Sew the ruffle to the CF of the shirt. Sew the button placket on top of the ruffle. Bind the neck edge with bias tape. Step 6 - gather and bind the bottom edge of the sleeves. Step 7 - sew the sleeves to the bodice. Step 8 - sew up the underarm and side seams in one. Step 9, 10 - hem both edges of the bottom skirt ruffle, then run a gathering stitch. Sew to the upper skirt piece. I also ran the gathering stitch on the upper skirt piece at this step. Step 11 - sew the skirt to the bodice and topstitch the seam allowance to the bodice. Step 12, 13 - Hem the CB of the bodice and upper part of the skirt so the edges are finished. Sew the lower part of the skirt together . Step 14, 15 - sew on hooks/eyes to close the CB. Sew beads or buttons on the button placket. Dress your girl!
Please note - I am not a beginner stitcher, and I have followed Japanese pattern books before, though this is the first time I have made Momoko clothes other than socks from one. The pattern and instructions are easy enough to follow - the main problem I had was with my machine. The opening in the plate is large enough that when I sew a tiny hem or with tiny seam allowance, it is extremely hard to stitch evenly. Some day I'll be able to afford a better machine - until then I'll just have to be satisfied with what mine will do.
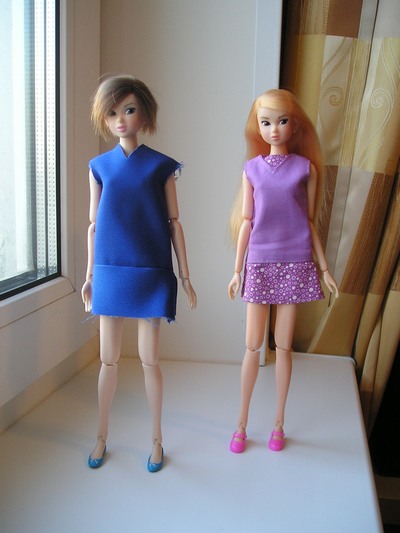
Also, if you like this tutorial let me know. I'm going to be making more from this book this weekend, and if this is popular I'll post more tutorials. Thanks for looking! And thanks to Aster for modeling - doesn't she look great?
Pēdējo reizi labojis Enifer 11.05.12 13:36; labots 1 reizi
Enifer Foruma dvēsele
Сообщения : 6795 Дата регистрации : 05.03.11 Откуда : Latvia, Norway
Tēma: Re: Выкройки на Momoko / Piegrieznes Momoko (der arī J-doll, Pullip, Kuhrn, šis tas moxie un bratz) 22.09.11 19:05
from my momoko.net by whispering-leaf from russia. [You must be registered and logged in to see this link.]
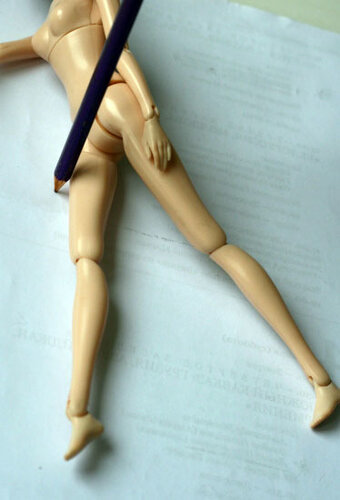
How to constract stockings pattern (tutorial)
Spoiler:
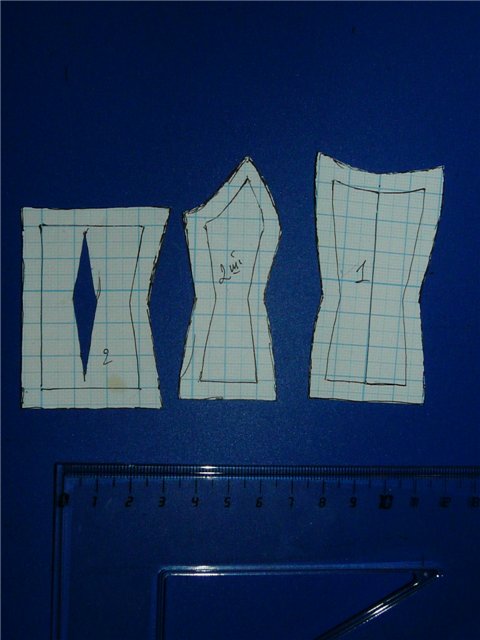
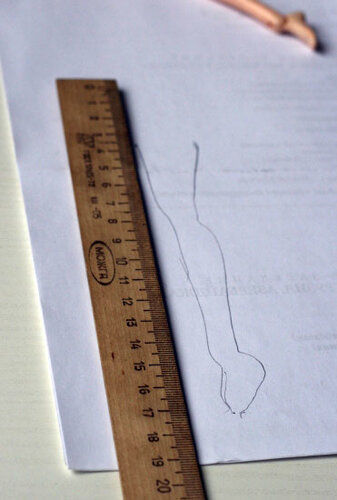
You will need: pencil paper (I use old documents for this) momoko ruler
1. put the doll on the side. you should make her step as if she is standing on her toe
2. outline her leg
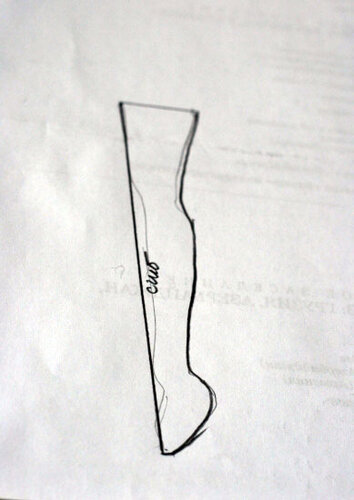
3. you'll have these:
4. take the ruler and unite two extreme points -it will be the fold line of stocking
5. outline in smooth way other part of your pattern
Pattern is ready =)
Pēdējo reizi labojis Enifer 11.05.12 13:37; labots 1 reizi
Enifer Foruma dvēsele
Сообщения : 6795 Дата регистрации : 05.03.11 Откуда : Latvia, Norway
Tēma: Re: Выкройки на Momoko / Piegrieznes Momoko (der arī J-doll, Pullip, Kuhrn, šis tas moxie un bratz) 27.11.11 4:20
Madin: Вот по этой ссылочке[You must be registered and logged in to see this link.] можно скачать брюки спортивные, курточку кенгурушку А тут еще целый журнал [You must be registered and logged in to see this link.] А еще на кимберли для зарегистрированых пользователей есть целый каталог вязаной одежды. от купальника до костюма Дерзайте девченки А еще из обычного носка можно сделать свитер вот такой например [You must be registered and logged in to see this link.] как его делать рассказывали тут же на форуме.
Tasha70 ну и если вы просите чтоб вам построили выкройку на момоку, напишите хотя бы какую платье брюки юбка или что там вашей момоке надо ;-)
Enifer Foruma dvēsele
Сообщения : 6795 Дата регистрации : 05.03.11 Откуда : Latvia, Norway
Tēma: Re: Выкройки на Momoko / Piegrieznes Momoko (der arī J-doll, Pullip, Kuhrn, šis tas moxie un bratz) 27.11.11 17:11